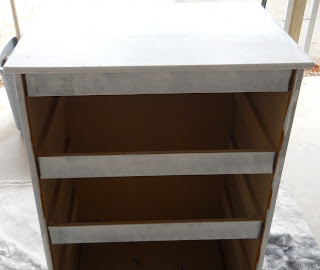
First, I primed the entire frame of the dresser with a fantastic product called Gripper by Glidden. It is thick primer that sticks to the wood. Here is a photo of the dresser and the primer.
Once the primer was dry, I was ready for painting. I wanted the body to be a solid color so I could play with the drawers. I chose the "tamest" color-green. It took two coats, but barely used any paint!
I used a spongy roller brush. I touched up the corners with a regular bristle brush. Both washed up with soap and water...and so did I. I used flat, but, if I ever repaint it, it will be glossy.
Finally, I came to the four drawers. I didn't paint them. I used Mod Podge and scrap-booking paper on each drawer. I chose 4 different colors-green, like the dresser, pink, purple and brown. I used brown because I didn't want to introduce a new room color. They all had the exact same design of the alphabet on them.
First, I cut the paper to fit the drawer. It had to be in two pieces because the drawers were too long for one. I can't seem to find my pictures of the drawers, but when I do, I will add them.
I put a thin layer of Mod Podge over the area one piece of paper would cover. I smoothed it and carefully pressed the paper on to the drawer. I rubbed it, smoothing out any wrinkles. When it was dry, I add the piece on the other side. Both dried and I began adding thin layers of Mod Podge to the top-in all three layers. Each layer dried before I added a new one. It is impossible to keep all the wrinkles out even though I smoothed it and watched it closely. My husband suggested that I thin out some of the glue and use a hypodermic needle to suck up the glue. Poke it gently through the bubble, injecting some of the glue. Smooth it down immediately. That worked with the big bubbles. I could just poke a hole with a pin and press down the small ones. Then I would cover them with Mod Podge. I did one drawer at a time and it worked pretty easily.
Finally, I wanted to add something fun to the drawers, something whimsical. To help me, my husband drilled holes for new drawer knobs. We placed two pieces of painters tape from corner to corner. He drilled where the two pieces crossed to put the hole in the center. We put two fun knobs on two of the drawers. I am currently in search of two different, yet similar, knobs for the other two drawers.
The final project came out pretty cute. Drum roll please....


No comments:
Post a Comment
Questions and comments are welcome!